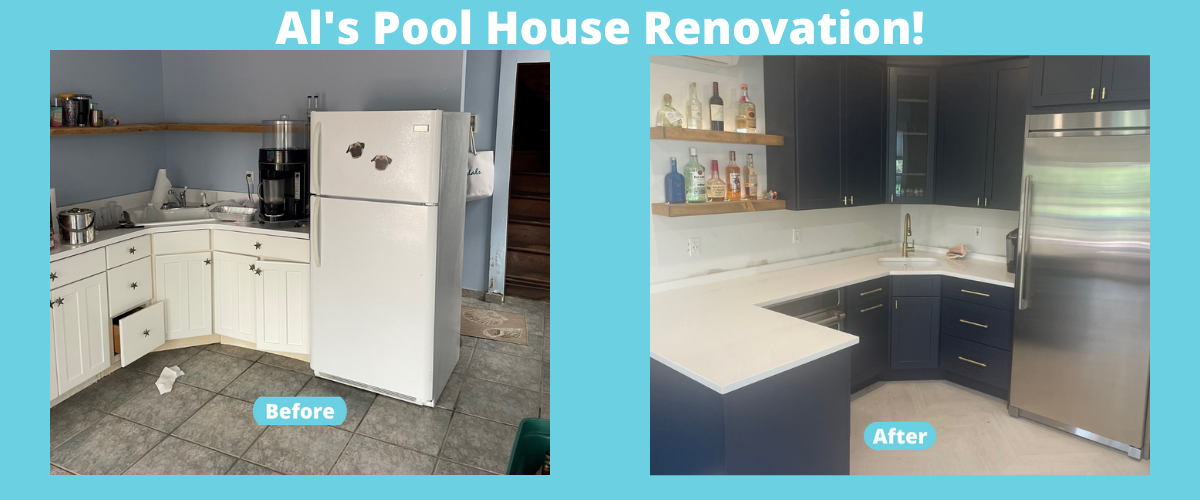
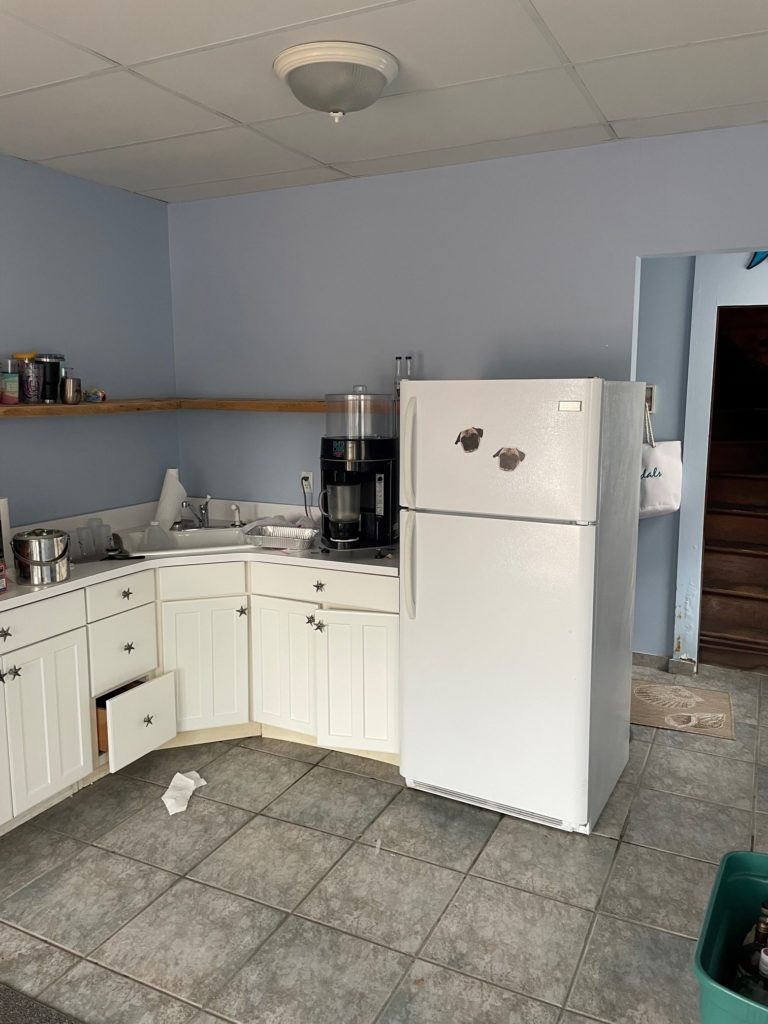
So, I finally get to share an area of the house I am redoing. One of the reasons I bought my house was the detached pool house. It was originally a horse barn back in the early 1900’s and converted to a 2-story pool house over the years.
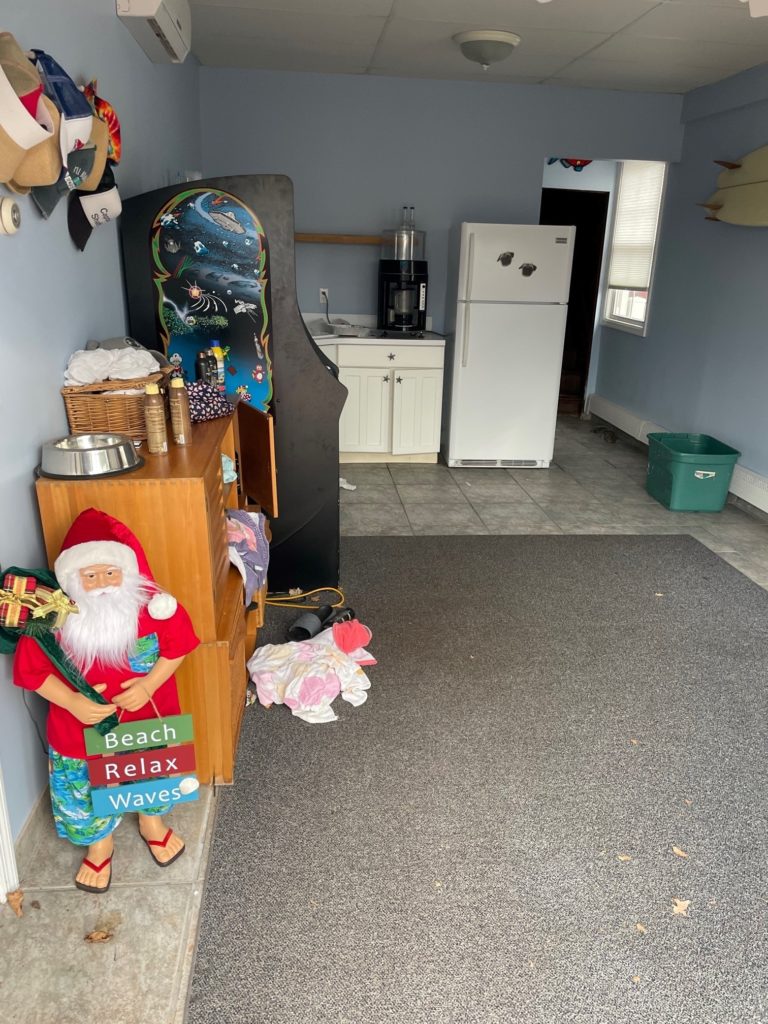
I moved in about 6-years ago, and this area was the least of my worries. After much work on the main house, I decided it was time to update the kitchen area down here. I think that any work done here last happened in the mid-80s.
This area was under a few feet of water during Superstorm Sandy in 2012! All they did was replace some sheetrock and put the cabinets back. They just left them to dry out. So, it was time to renovate it. I had set a budget up and gave myself a 10-12 week time frame. I wanted it done in early spring so we could use it in the warmer months.
I purposely left the plumbing and electrical where they were to save money on the project. My goal was to change the cabinets, change the flooring, update the lighting, add a TV area, and make the kitchen functional if a guest wanted to stay over.
First, the design choices I made, include:
- A porcelain tile floor in the chevron pattern
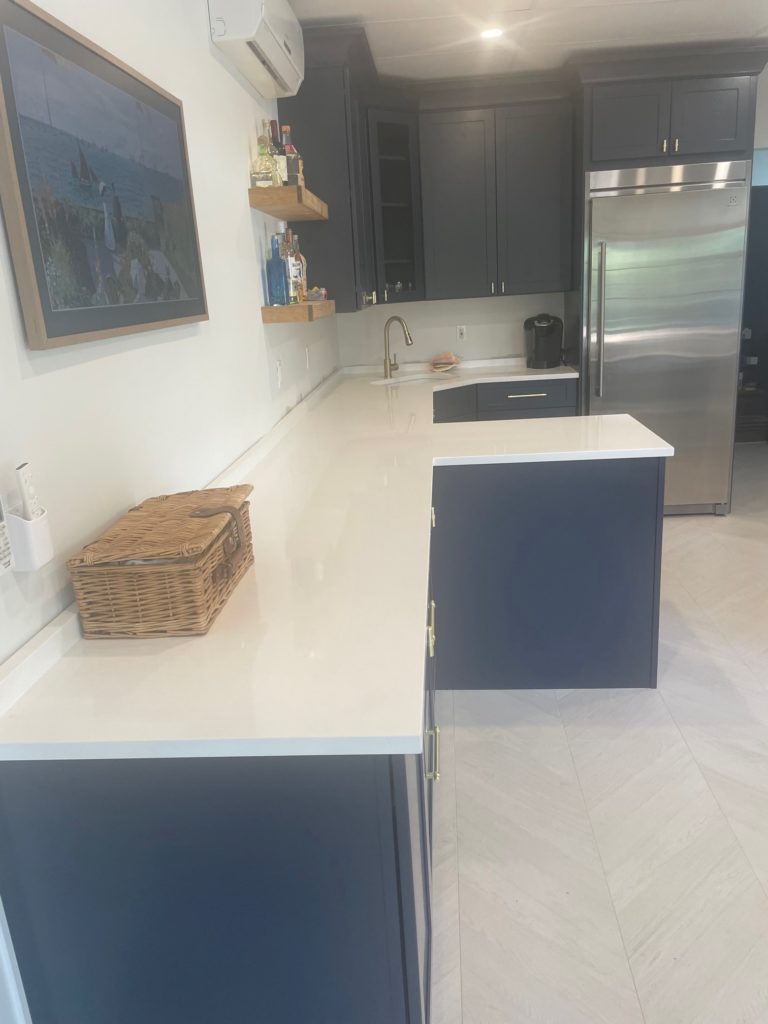
- Indigo blue cabinets
- LED lighting upgrade
- Added a small bump out of an island to give the kitchen a slightly different area from the TV side
This was my plan of attack.
Week 1: Grab the kids and ripped out all the existing cabinets and furniture right to the curb!
Week 2: I ordered and had the tile installed. I went over the existing tile as I had the height and saved some money.
Week 3: Measure the space and order cabinets.
Week 4: Gave the electrician the cabinet plan and had him get to work!
Week 5: Had the painter come in and clean all the walls and corners. Painting the ceiling grid as well since it was an old dropped ceiling in there
Week 6: I put in all new ceiling tiles (the electrician already had lights in a few to save time).
Week 7: Cabinets came in and were installed within a few days with the help of a good friend.
Week 8: Had countertops templated.
Week 9: Put on all the finishing touches, trim plates, and cabinet hardware. Also, I had the electrician back to finish up.
The countertops were finished and ready to be installed. One week left!
Week 10: Had the painter come back for final trim.
That was the timeline and here are the finances.
I budgeted $20k. Here is the breakdown:
So, that was pretty much the rundown. I hope you like the finished results!
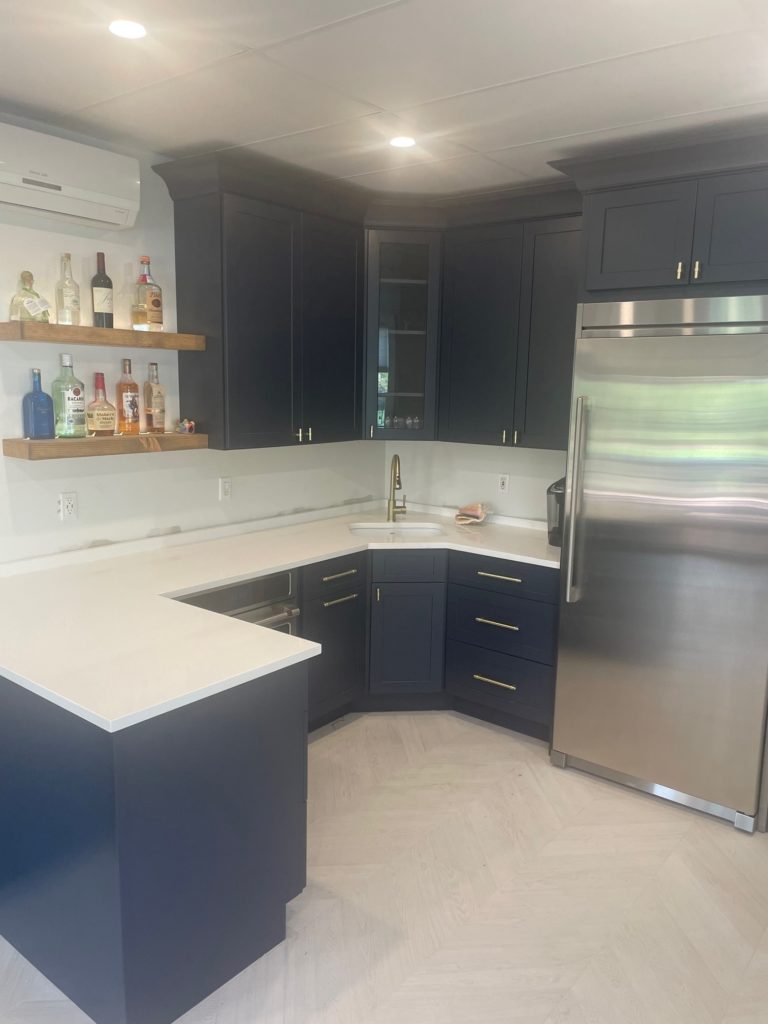
For appliances, I opted for an All-fridge by Electrolux and the GE Advantium 5-in-1 oven that I talk so much about here. I have a freezer on the unfinished side, right next to a bulk ice machine. I felt the 5-in-1 feature list was ideal. So you can air fry, bake, broil, or just microwave in that one unit!
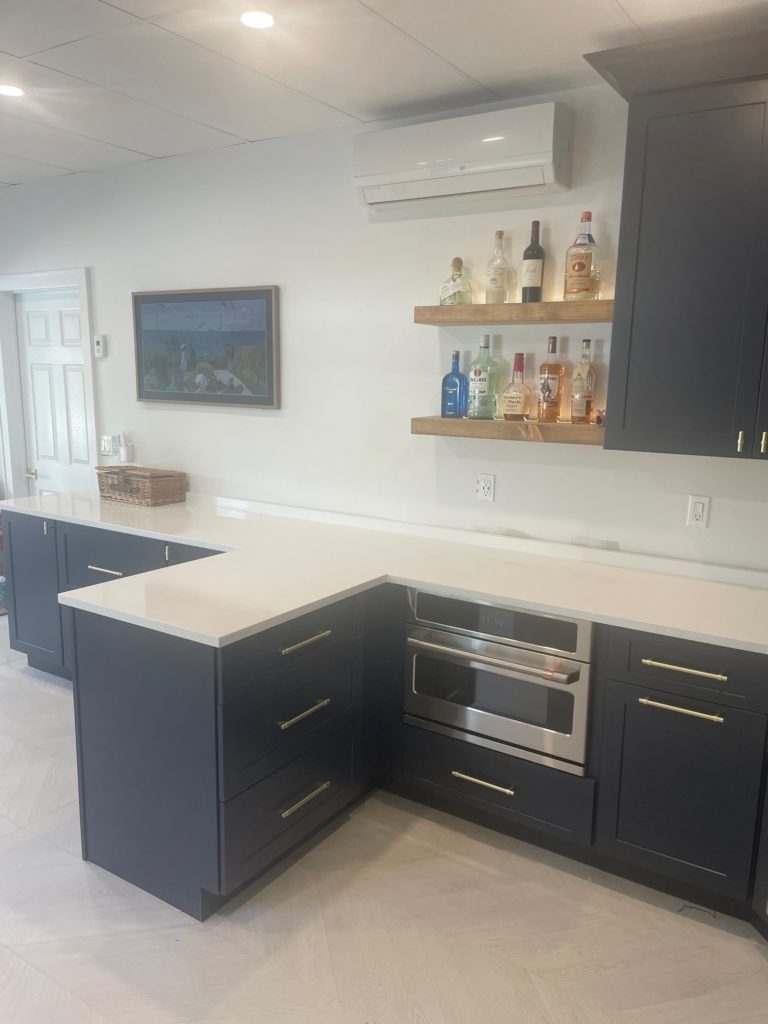
I put the 5-in-1 under the counter. So, it didn’t ruin any sightlines. The shelves have led strips in them to light up the liquor bottles. I bought them on Etsy for about $150 each and was very happy with the quality.
I also sunk an LG combo washer-dryer into the wall. Not only for guests, but this area is by the pool. So an ideal setup to throw towels in, then not worry about moving them to a dryer. This also helped keep the cost down as it was 110 volts and required no venting. I wouldn’t use it in my main house area, but it was ideal for this project.
After all, was said and done, I was right around the $20k mark. The goal was to keep it simple yet dress it up. I was a little nervous about using gold hardware with the stainless fridge. But at the end of the day. I love the mix of metals! The framed TV, for me, was a cool touch as it really looks like a photo when turned off!
Everyone who saw it unfinished didn’t get the concept of the small island bumped out. But I’m a measure twice, cut once type of guy, and I knew that a larger island wouldn’t function well with a couch in the way. When people see it now, they totally get the concept and like the look! A lot of times when we talk on here, I say:
Do what fits your lifestyle, and do what works for you
It is always nice if you can afford a designer, but they are not living in your home. A pretty home isn’t always a functional home.
People asked me, how can you not do a freezer? Why no cooktop? I mean I like guests, but I don’t want them to get too comfortable 😊 I stuck to the concept. It’s a place to come in, have a drink, and maybe watch a little TV and light entertainment. It’s not a full kitchen. It’s more like a fancy wet bar used for a lot of entertaining.
I hope you like it, and please share your photos when your projects finish up! I love to see them!
Interested in purchasing any of these appliances? Head to Plessers.com or call 1-877-957-5377 and tell them Al sent you!
-Al


Leave a Reply
You must be logged in to post a comment.